

Install and Configure MySQL database on Ubuntu for remote connection over SSH with MySQL Workbench
Install MySQL:
 sudo apt install mysql-server
 sudo mysql_secure_installation
After creating root user, login as root:
mysql -u root -p
To create and grant access to a user to a specific db use:
GRANT ALL PRIVILEGES ON databasename.tablename TO 'username'@'123.456.789.123' IDENTIFIED BY 'password';
Replace all the quotes(‘) parts and db.table with your relevant information. IP would be the server IP address.
If you want the user to be able to create new databases and modify permissions, then use:
GRANT ALL PRIVILEGES ON *.* TO 'username'@'123.456.789.123' IDENTIFIED BY 'password' WITH GRANT OPTION;
Save changes:
FLUSH PRIVILEGES;
exit
Bind MySQL to the server IP:
sudo nano /etc/mysql/mysql.conf.d/mysqld.cnf
Replace the line bind-address = 127.0.0.1 with bind-address = 123.456.789.123 where 123.456.789.123 is your server IP.
Restart MySQL:
sudo systemctl restart mysql
Allow MySQL from Firewall:
sudo ufw allow mysql
Reload the Firewall rules:
sudo ufw reload
MySQL Workbench accepts SSH key in OpenSSH Format, so to covert your private ssh key to OpenSSH Format do these steps:
-
Start puttygen.exe
-
Load your putty private key
-
Insert your passphrase
-
Export the key (Conversions > Export OpenSSH Key [openssh_key.ppk])
Once the key is setup, we can configure the MySQL Workbench Connection.
Create a new connection. Set the connection name.
For Connection Method, select Standard TCP/IP over SSH
Under the Parameters Tab, enter the following information:
SSH Hostname: 123.456.789.123:22
SSH Username: {your SSH username}
SSH Password: leave blank/click “Clear” to be safe
SSH Keyfile: path to openssh_key.ppk we just created
MySQL Hostname: 123.456.789.123
MySQL Port: 3306
Username: your database username
Password: your database password
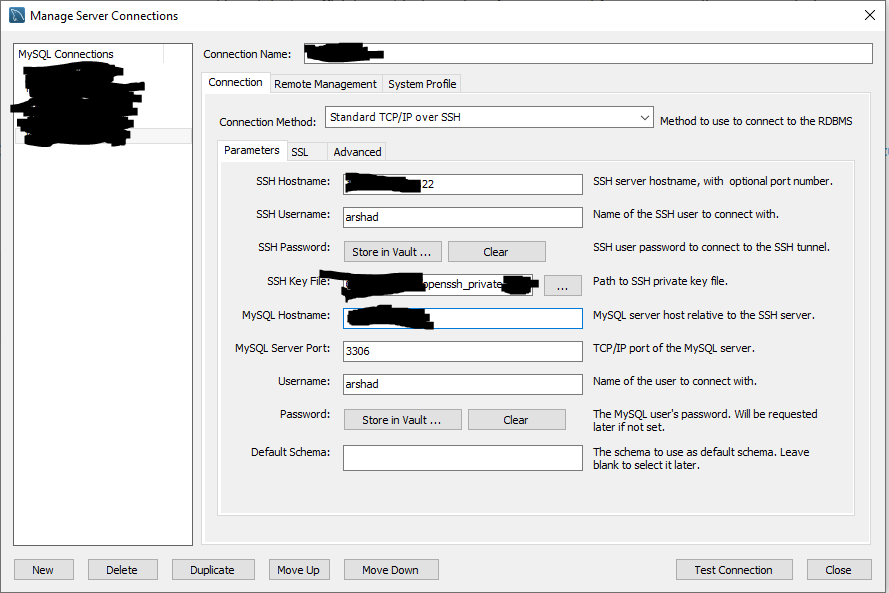
Click Test Connection and everything should work fine.

Leave a comment