Build And Deploy Gitlab Project Repository To Firebase Hosting With Continuous Integration
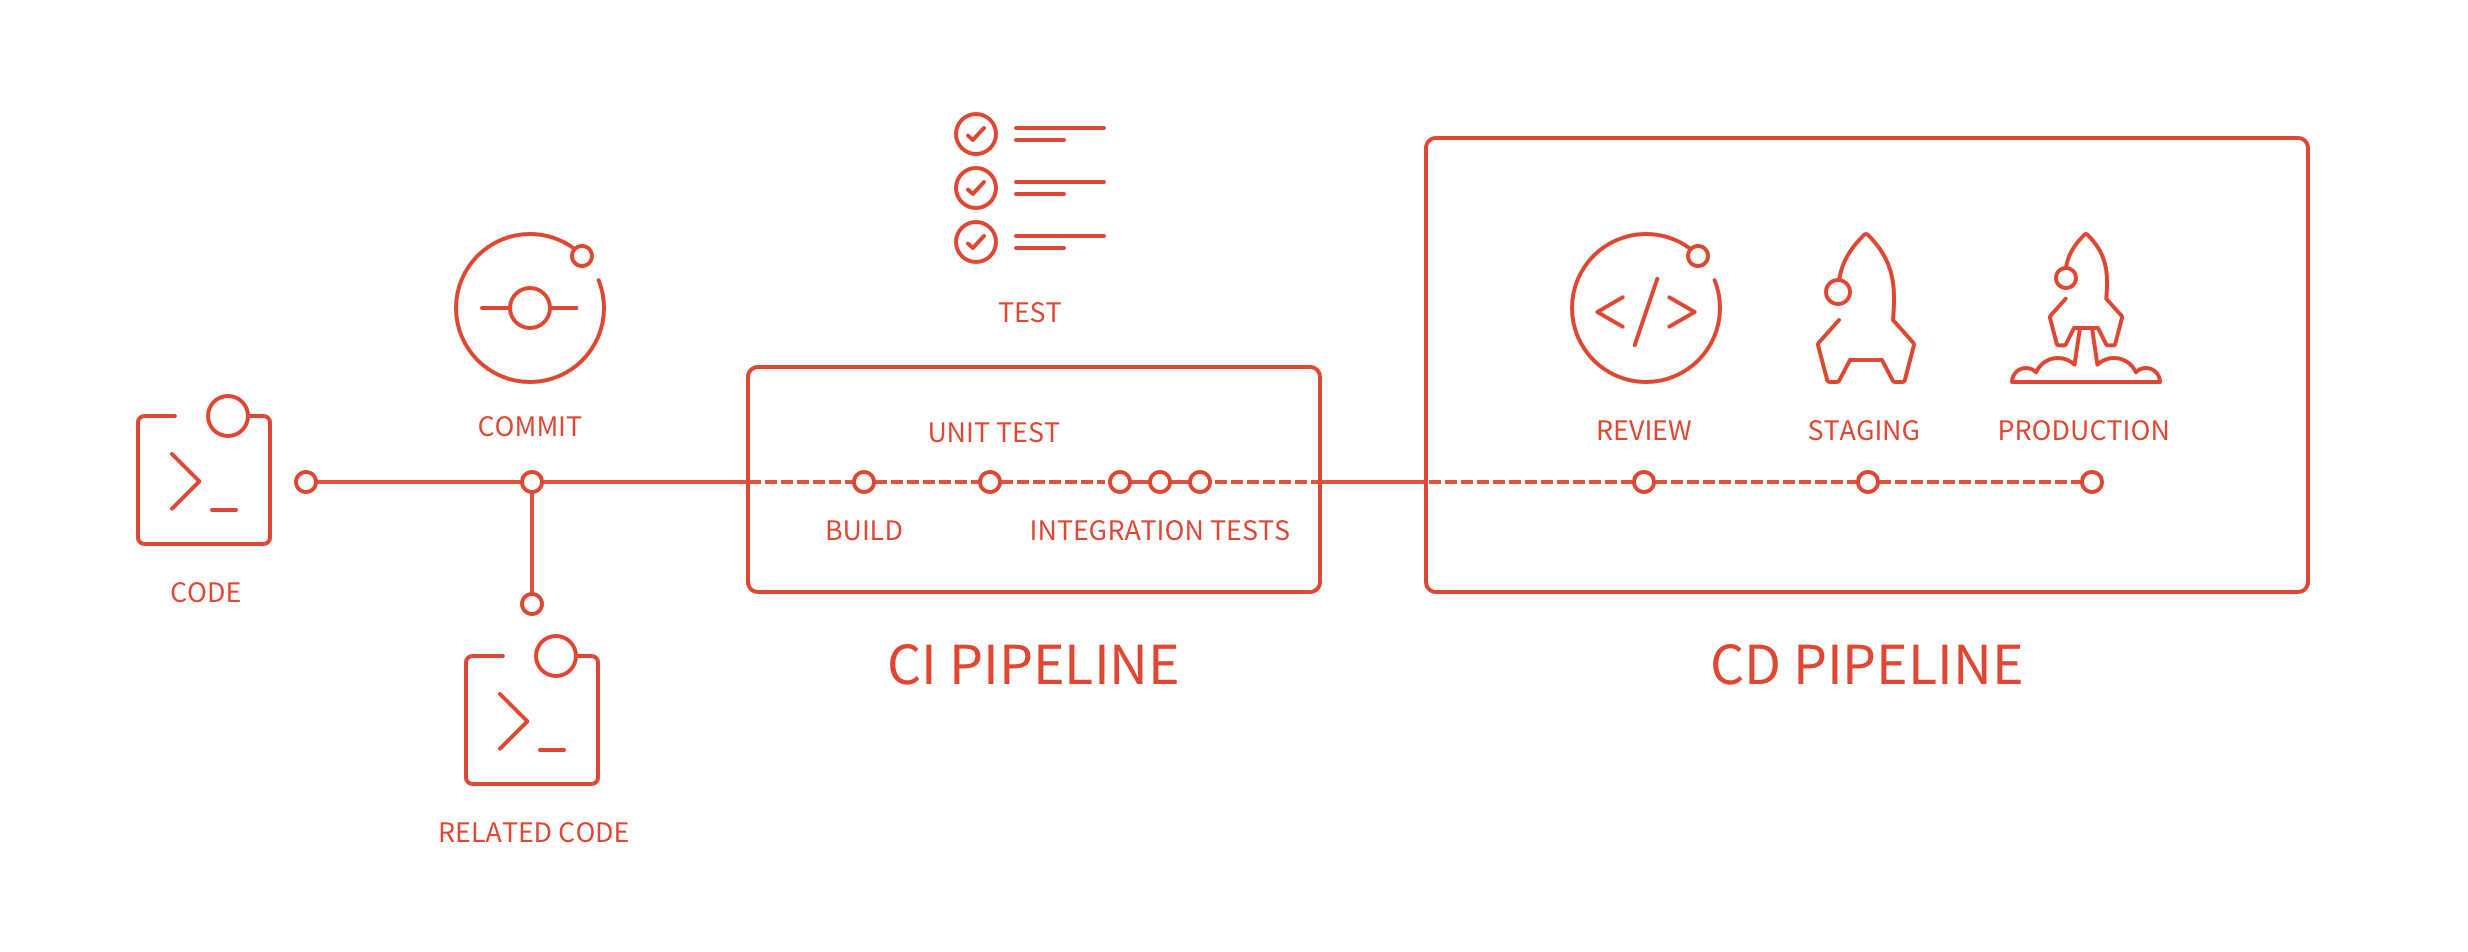
Previously, I wrote a blog post on how to Deploy Angular App To Firebase Hosting and Deploy Gitlab Project/Repository to Heroku app with Continuous Integration in 5 minutes!. Now we will use Gitlab’s Continuous Integration (GitLab CI/CD) to build and deploy an Angular 6 app to Firebase Hosting . It’s really cool!
Create a new angular app or use an existing project.
Firebase Token
- Install Firebase tools.
In order to deploy to Firebase, we’ll need the Firebase CLI tools
npm install -g firebase-tools - Login to Firebase
firebase loginThis will open a browser tab, where you can login. Once you login, you will also see a token on the command prompt, copy this token as we will use it on Gitlab. It will look something like this:
1/qX11M4Y413rn4Ezlj-q9LhtLaI13S4R400_J1y1BdQXDiE4NTvp - Initiliaze Firebase in your project.
Go to your project folder and run this command:
firebase initFollow these steps:
- Are you ready to proceed? Yes
- Which Firebase CLI features? Hosting (In the future, use whatever you need! Press space to select.)
- Select a default Firebase project? (Choose whatever app you created in the earlier steps)
- What do you want to use as your public directory? dist (This is important! Angular creates the dist folder.)
- Configure as a single-page app? Yes
Once you initilize the app, two files will be created in the folder: #### .firebaserc
  {
     "projects": {
       "default": "project-id"
     }
  }
#### .firebase.json
  {
 "hosting": {
   "public": "dist",
     "rewrites": [
       {
         "source": "**",
         "destination": "/index.html"
       }
      ]
    }
  }
Gitlab
Our Gitlab repository will host the code of our application and also the .gitlab-ci.yml configuration file for continuous integration.
- Create a new git repository/project on Gitlab.
- Go to setting of the project and then to CI/CD.
- There you will see a section named Variables. Click on Expand.
- Enter your Firebase Token from the previous steps. Name the token as
FIREBASE_DEPLOY_KEYand paste the value. - Set as protected.
.gitlab-ci.yml
This is the magic file which lets us deploy our code or run test, or run scripts. You can read about it in detail here.
Following are the contents of out simple .gitlab-ci.yml file:
stages:
  - deploy
deploy:
  image: node:8
  stage: deploy
  environment: production
  script:
    - npm install -g firebase-tools
    - npm install @angular/cli
    - npm install
    - ./node_modules/@angular/cli/bin/ng build --progress false --prod
    - firebase deploy --token "$FIREBASE_DEPLOY_KEY" -P "project-id"

  only:
    - master
In this file we create a new job to push our code to Firebase hosting. We install the firebase tools, angular cli and the remaining dependencies of the project, afterwards we build the project and then deploy it. We use the FIREBASE_DEPLOY_KEY Token key. We only push the master branch, you can change to any other branch.
This is it!
Now every time you commit your code to gitlab, the app is built and deployed to Firebase Hosting. You can view the running Pipelines in the CI section of your project on Gitlab. Since, we are also building the app, it takes around some time to build and deploy, so please be patient. If you have done everything properly, then the build will be passed and you will be able to see your application running on Firebase Hosting. Goodluck :)
Buy me a cup of coffee with ETH: 0x681a83007bC52C0bF42B41263Dc498f9Ef7af02A


Leave a comment